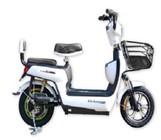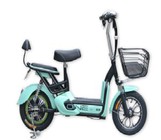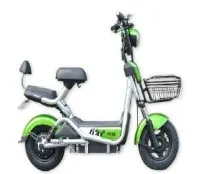

Hey there, fellow e-bike enthusiasts! I'm an e-bike supplier, and I know how awesome it is to customize your ride. One of the most practical upgrades you can make to your e-bike is installing a rear rack. It opens up a whole new world of possibilities, from running errands to going on longer trips with all your essentials. In this blog, I'll walk you through the process of installing a rear rack on an e-bike, step by step.
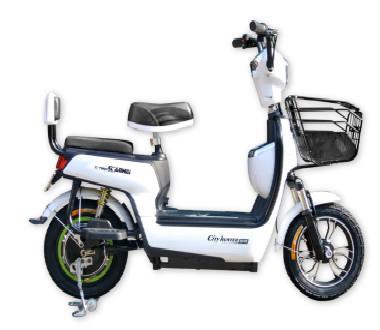
Why You Need a Rear Rack
First off, let's talk about why a rear rack is such a great addition to your e-bike. Whether you're using your e-bike for commuting, grocery shopping, or just a weekend adventure, a rear rack gives you a stable platform to carry stuff. You can attach panniers, baskets, or even a cargo box, depending on your needs. It makes your e-bike way more versatile and functional.
Choosing the Right Rear Rack
Before you start the installation process, you need to pick the right rear rack for your e-bike. There are a few things to consider:
- Compatibility: Not all rear racks fit all e-bikes. You need to make sure the rack is designed to work with your specific e-bike model. Check the manufacturer's specifications to see what racks are compatible.
- Weight Capacity: Think about how much weight you'll be carrying on the rack. Different racks have different weight capacities, so choose one that can handle your typical load.
- Material: Rear racks are usually made of aluminum or steel. Aluminum racks are lightweight and corrosion-resistant, while steel racks are more durable and can handle heavier loads.
Tools You'll Need
Once you've got your rear rack, it's time to gather the tools you'll need for the installation. Here's a list of the basic tools:
- Wrenches: You'll need a set of wrenches to loosen and tighten bolts. Make sure you have the right sizes for your e-bike and the rear rack.
- Screwdriver: A Phillips or flathead screwdriver may be needed to remove any existing parts or to attach the rack.
- Allen Keys: Some e-bikes and rear racks use Allen bolts, so having a set of Allen keys is essential.
- Pliers: Pliers can come in handy for holding small parts or bending wires if necessary.
Step-by-Step Installation Process
Now, let's get down to business and install that rear rack! Here's a step-by-step guide:
Step 1: Prepare Your E-Bike
- Park your e-bike on a flat, stable surface. Make sure the bike is turned off and the battery is removed for safety.
- Clean the area where the rear rack will be installed. Remove any dirt, debris, or grease to ensure a good fit.
Step 2: Identify the Mounting Points
- Look at your e-bike's frame to find the mounting points for the rear rack. These are usually located near the rear axle or on the seat stays. Some e-bikes may have pre-drilled holes for the rack, while others may require you to use brackets or clamps.
- Refer to the rear rack's instructions to see where it should be attached. If you're unsure, you can also check online forums or contact the e-bike manufacturer for guidance.
Step 3: Attach the Brackets or Clamps
- If your rear rack comes with brackets or clamps, attach them to the mounting points on your e-bike's frame. Use the appropriate tools to tighten the bolts or screws securely. Make sure the brackets or clamps are aligned correctly and are not loose.
- If your e-bike has pre-drilled holes, you may need to insert bolts through the holes and attach the rack directly. Follow the instructions carefully to ensure a proper fit.
Step 4: Install the Rear Rack
- Once the brackets or clamps are in place, it's time to install the rear rack. Place the rack on top of the brackets or clamps and align the holes.
- Insert the bolts or screws through the holes in the rack and the brackets or clamps. Use the wrenches or Allen keys to tighten the bolts or screws until the rack is securely attached. Make sure the rack is level and centered on the e-bike.
Step 5: Check the Fit and Stability
- After installing the rear rack, give it a gentle shake to make sure it's stable. Check that all the bolts and screws are tightened properly and that the rack doesn't move or wobble.
- If you notice any issues, such as a loose fit or unevenness, adjust the brackets or clamps as needed. You may also need to re-tighten the bolts or screws to ensure a secure installation.
Step 6: Test the Rear Rack
- Before you start using your e-bike with the rear rack, it's a good idea to do a quick test. Attach a small item, such as a backpack or a light box, to the rack and take a short ride around the block.
- Pay attention to how the e-bike handles with the added weight on the rear rack. Make sure the bike is still stable and easy to control. If you notice any problems, such as a change in the bike's balance or handling, stop riding and make the necessary adjustments.
Tips and Tricks
Here are some additional tips and tricks to make the installation process easier and ensure a successful outcome:
- Read the Instructions: Before you start the installation, read the instructions that come with your rear rack carefully. Make sure you understand all the steps and have all the necessary tools and parts.
- Take Your Time: Installing a rear rack can be a bit tricky, especially if you're not familiar with bike maintenance. Take your time and don't rush the process. It's better to do it right the first time than to have to go back and fix something later.
- Ask for Help: If you're not confident in your ability to install the rear rack yourself, don't be afraid to ask for help. You can take your e-bike to a local bike shop and have them install the rack for you. They have the experience and tools to do it quickly and correctly.
- Consider the Weight Distribution: When you're loading items onto the rear rack, make sure to distribute the weight evenly. This will help keep the e-bike balanced and stable while you're riding.
Conclusion
Installing a rear rack on your e-bike is a great way to increase its functionality and versatility. By following the steps outlined in this blog, you should be able to install a rear rack on your e-bike with ease. Remember to choose the right rack for your e-bike, gather the necessary tools, and take your time during the installation process.
If you're in the market for a new e-bike or looking to upgrade your existing one, check out our selection of 48V 20Ah EBike, Cute Electric Mini Electric bike, and Aluminum Electric Bicycles. We offer a wide range of high-quality e-bikes at competitive prices.
If you have any questions or need further assistance with your e-bike or rear rack installation, feel free to contact us. We're here to help you make the most of your e-bike experience.
References
- Manufacturer's instructions for your e-bike and rear rack
- Online bike forums and communities
- Local bike shops and experts